[headline style=”17″ align=”center” headline_tag=”h2″]
In The Studio With Shots In Order
[/headline]
Hello again, and welcome back to part 3 of Record, Mix, and Master: Do It Yourself! At this point we have discussed the basic equipment to get started with your own home music studio and how to properly set up your studio environment. Check out Part1 and Part 2. Now we take it one step further, as I show you how I built my own acoustic panels. With just a few items, you can have high quality acoustic panels for a very affordable price.
So here are the items you are going to need:
[bullet_block style=”size-16″ small_icon=”11.png” width=”” alignment=”center”]
- INSULATION
- FABRIC
- WOOD
- STAPLE GUN
- BOX CUTTER OR KNIFE
[/bullet_block]
[bullet_block large_icon=”39.png” width=”” alignment=”center”]
- INSULATION
[/bullet_block]
Owens Corning 703 acoustic insulation(also called rigid fiberglass) is the #1 material used to build acoustic panels and bass traps. It’s stiff enough to be easily wrapped without requiring to be framed yet it is very easy to cut into shape. – ATS Acoustics
[images style=”2″ image=”http%3A%2F%2Fwww.shotsinorder.com%2Fwp-content%2Fuploads%2F2015%2F11%2FIMG_2373-300×224.jpg” width=”300″ align=”center” top_margin=”0″ full_width=”Y”]
This is what I used for my DIY acoustic panels. They cost $67.00 for a 6-pack on amazon, and sold by ATS Acoustics. After putting these on my wall and listening in the mixing position, the sound was much more controlled and tightened wich helped improve my mixes. So for anybody looking for an affordable solution for improving the acoustics in their studio, this is the most affordable way to go and highly recommended.
[feature_box style=”2″ only_advanced=”There%20are%20no%20title%20options%20for%20the%20choosen%20style” alignment=”center”]
Use a utility knife If you have to cut the fiberglass panels to a different size. You can use any type, I happened to have my leatherman handy and used the knife in there.
[/feature_box]
[images style=”2″ image=”http%3A%2F%2Fwww.shotsinorder.com%2Fwp-content%2Fuploads%2F2015%2F12%2FIMG_0872-300×225.jpg” width=”300″ align=”center” top_margin=”0″ full_width=”Y”]
[bullet_block large_icon=”40.png” width=”” alignment=”center”]
- FABRIC
[/bullet_block]
When it comes to the fabric to use to wrap the rigid fiberglass insulation, I’ve read that Burlap is highly recommended for acoustics. WIth that being said, I went out on a journey to purchase Burlap, but I was not convinced in using this material. The fabric itself was very itchy and seemed to shed, and was not very attractive to be put on my walls. Maybe I was looking at the wrong thing. Anyway, I decided to use a velvet fabric, looked great in the studio, and matched the other acoustic panels I have. If you’re looking for fabric, you can go to places like Michaels or Joann. I did my shopping at Joann.
[images style=”2″ image=”http%3A%2F%2Fwww.shotsinorder.com%2Fwp-content%2Fuploads%2F2015%2F12%2FIMG_0876-300×225.jpg” width=”300″ align=”center” top_margin=”0″ full_width=”Y”]
[feature_box style=”2″ only_advanced=”There%20are%20no%20title%20options%20for%20the%20choosen%20style” alignment=”center”]
After wrapping the fabric, you will need a staple gun to secure the fabric to the wooden frame you built. I used the Arrow 5700 Powershot Staple and Nail Gun.
[/feature_box]
[images style=”2″ image=”http%3A%2F%2Fwww.shotsinorder.com%2Fwp-content%2Fuploads%2F2015%2F12%2FIMG_0878-300×225.jpg” width=”300″ align=”center” top_margin=”0″ full_width=”Y”]
[bullet_block large_icon=”41.png” width=”” alignment=”center”]
- WOOD
[/bullet_block]
For the wood I visited my local Home Depot, where they were cut into sections and then built at home. Here is an example below.
[images style=”2″ image=”http%3A%2F%2Fwww.shotsinorder.com%2Fwp-content%2Fuploads%2F2015%2F12%2FIMG_0874-300×225.jpg” width=”300″ align=”center” top_margin=”0″ full_width=”Y”]
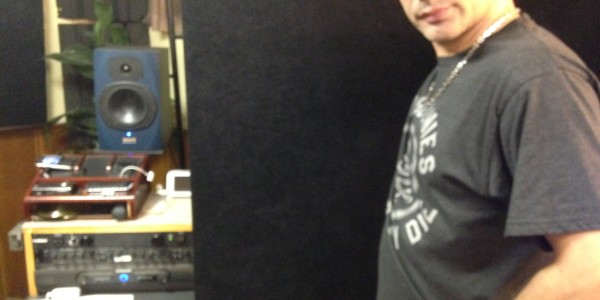
[headline style=”1″ align=”center” headline_tag=”h2″]
The Finished Product
[/headline]
[images style=”2″ image=”http%3A%2F%2Fwww.shotsinorder.com%2Fwp-content%2Fuploads%2F2015%2F12%2FIMG_0880-225×300.jpg” width=”225″ align=”center” top_margin=”0″ full_width=”Y”]